Most medical alert companies provide do-it-yourself self-installation kits because installing a medical alert system yourself is easy. Your medical alert company will have specific installation instructions and procedures for activating your system and service. Depending on which product you purchased, the medical alert system installation is as simple as plugging it in and testing the button! Please follow the product installation guide carefully and use this information as a basic overview and guide. Remember, additional help can be just a telephone call away if you have trouble during the installation process and we suggest calling the company’s customer care team to assist, if needed.
Landline-Based Medical Alerts
Traditional Landline-Based Medical System Alert Installation Steps:
We will focus on a basic landline Personal Emergency Response System (PERS) that has been used by many providers, including LifeStation, LifeFone, and others. This system is UL Listed as a home healthcare signaling device, which means that it has been tested and certified by one of the most respected independent testing agencies in the world. This particular medical alarm system requires a home phone landline and may be ideal for older adults who are aging in place and do not leave home as often.
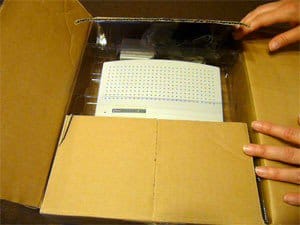
- Unpack your medical alert system and be sure you have all of the system components. This will usually include: the medical alert system console, the plug-in power transformer, the wireless medical alert pendant, a telephone line cord, and any other optional transmitters or devices you may have ordered. Make sure to keep your box in case you need to return or replace the device.
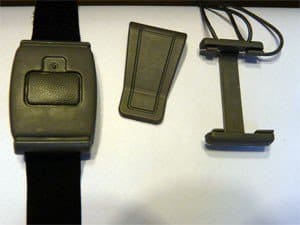
- Depending on your system’s options, you may need to set-up your transmitter as either a wristwatch, pendant, or belt-clip. Simply snap it into place. The wristwatch is a very popular option for most seniors as they are already used to wearing one. The medical alert pendant is also very popular if you prefer to also wear a watch to keep time or have an optional fall detection pendent (available with some systems). The key is to wear your medical alert device at all times so that you are protected. So, choose the most comfortable and easy to wear option for you.

- Find a suitable place in the home for the base unit. A central part of the house would be a good choice as it will spread the range of the transmitters more equally. Most likely you will want to locate the unit in the bedroom on a nightstand, in the family room, or any place where your loved one spends most of their time. Keep in mind the range of your particular unit to be sure you have enough coverage. Most medical alert devices have a range of 350ft-1,500 ft. Be sure to check our medical alert comparison chart to see what range your system has. Some medical alert providers sell a range extender if needed. Wherever you choose, the traditional medical alert system needs to be near a telephone jack and AC power receptacle.
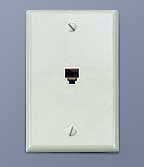
- Unplug your telephone from the wall jack and plug it into the jack on the console marked “Phone.” If there is no phone currently connected to the wall jack, simply skip this step.
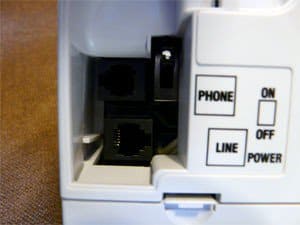
- Use the supplied telephone line cord and plug it into the console to the jack marked “Wall” or “Line,” and connect the other end to the wall where you removed the telephone connection in step 4.
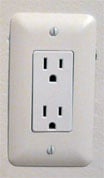
- Plug the AC transformer in a wall outlet. Be sure that the wall outlet has power all the time and cannot be turned-off by a switch.
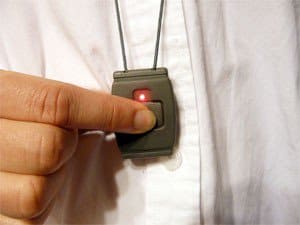
- Follow your testing procedures provided by your medical alert monitoring company. Usually this entails manually pushing the emergency button and speaking to the emergency operator to tell them it is a test. Be sure to test your button at least once a month, even if your system does provide automatic system tests. This is because the automatic tests are only checking whether the alarm signal is getting to the monitoring center, but not the button itself. If you have more than one button, check them too. Since your loved one is most likely elderly and may have trouble hearing, check the volume to be sure they can hear the emergency response clearly.
Cellular-Based Medical Alerts
Cellular-Based Medical Alert System Installation Steps:
- Unpack all the components from the box and make sure to keep the box for potential future needs, like returning the equipment.
- If your particular unit includes an external antenna, place it on the side of the unit to the upright position to ensure it will get the best signal.
- Simply plug the unit’s power transformer into a wall jack that has a central location in your home for best coverage (see traditional landline set-up above for more details). Again, you will want to be sure the outlet has power at all times and cannot be turned off accidentally by a switch. Wait a minute or so for system to establish a cellular connection. It will alert you when the system is ready for use. If the system cannot establish a cellular connection, you should move the unit closer to a window to see if it can receive a better signal.
- Test the system with the button that came with the unit. Press the button and when you connect with the operator, let them know you are just testing the system. Make sure you can hear them clearly. If the signal is weak, you may want to purchase a cell phone signal booster.
- For best practices, test your system on a monthly basis to make sure it is working properly. Check to see if your medical alert provided does automatic system tests for additional peace of mind, but don’t forget to test your button too (see #7 above). Problem Solving Tip – If there is something wrong with your system, it is best to find out before there is an emergency. If you find that your button or system isn’t working as it should, we suggest asking for a replacement ASAP.
Starting Up Your Medical Alert Monitoring Service
Depending on if you provided this information during the order process or not, you will need to set-up your monitoring service emergency call list, provide a list of ailments and your lockbox code and location, if you have one. We suggest giving your medical alert company a list of family, friends or neighbors to call when an emergency arrives. Be sure to let them know that they are on the list and verify that they have access to your home. Since you might not always need emergency services or you would like to notify a caregiver or friend to be there when EMS arrives, be sure to give the contact information for someone who lives close by and can assist quickly. Seniors who age in place should also ask if their medical alert company provides a medical history information card, medical ID or medical identification tags so that when help arrives, their aliments can easily be identified. If you already have your own list of medications, conditions or special instructions from your doctor, let your monitoring company know where it is located so they can provide that information to the first responders.
We hope this Buyer’s Guide was helpful to you. Please be sure to check out our medical alert reviews and medical alert device comparisons to learn more about the different systems and service providers that are available to you.
Our medical alert star rating system can also help you make the best choice for yourself or loved one. It simplifies the process of choosing the best medical alert system. Remember some medical alert companies provide professional installation for their systems but in most cases, set-up is a breeze!